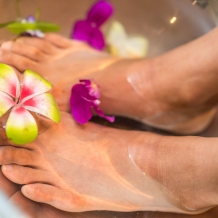
DIY Pedicure
After a long practice, a day at work or just a weekend spoil session, one of the best ways to relax is with a pedicure! If you want the fun of doing it at home or just looking to save a little money, don't worry we're breaking down everything you need + a step by step guide to the perfect at home pedicure. If you're looking for a fun activity to do with your little one, this one would be perfect! Have your young one help prepare everything and then show them how to complete each step. It's a fun and rewarding bonding experience.
Here's what you'll need:
- Polish Remover
- Cotton Balls or Pads *If you already have polish on
- Nail Clippers
- Nail File
- Nail Block (Buffer)
- Large Bucket (Or you can use your bathtub)
- Essential Oil
- Epsom Salt
- Baking Soda
- Pumice Stone
- Raw Cane Sugar
- Olive Oil or Coconut Oil
- Thick Moisturizing Cream
- Nail Polish
- Top Coat
Directions:
- Use the nail polish to remove any existing polish
- Trim your nails, next file down rough edges and buff the top of them.
- In a bucket or your tub, combine one cup Epsom salt, one teaspoon baking soda and four or five drops of essential oil
- Stir together and soak your feet for 10-15 minutes, dry with a towel
- Once dry, rub foot with a pumice stone.
- In a separate small bowl, mix together one cup sugar, half a cup of olive oil and a few drops of essential oil.
- Rub mixture all over feet and legs, scrubbing to remove dry skin. Let soak for a few minutes and rinse.
- Next, slather on a lot of moisturizer. If you have time, wear a pair of socks for a couple hours so the lotion can really soak in.
- Once you're ready to paint your nails, use another cotton pad with nail remover to clean the nails of any lotion or moisturizer.
- Paint nails with two coats and then top with the top coat.
- Let dry
Now that your feet are all pretty and polished, you have no excuse not to get back into the gym and show off your gorgeous new pedicure!